
Winterizing your outdoor faucet without a shut-off valve can be tricky, but fear not – there is a solution. By following a few simple steps, you can protect your outdoor plumbing from freezing temperatures, preventing costly damage. With the right tools and know-how, you can ensure that your outdoor faucet survives the winter unscathed. Let’s dive into the necessary steps to safeguard your outdoor faucet without a shut-off valve this winter.

How to Winterize Outdoor Faucet Without Shut Off Valve
Welcome, curious minds! As the chilly winds of winter approach, it’s essential to prepare your home for the freezing temperatures ahead. One crucial task to safeguard your outdoor faucets from potential damage is winterization. But what do you do if your outdoor faucet lacks a shut-off valve? Fret not, for we have got you covered! In this comprehensive guide, we’ll walk you through the steps to winterize your outdoor faucet without a shut-off valve effectively. Let’s dive in!
Understanding the Importance of Winterizing Outdoor Faucets
Before we delve into the specifics of winterizing your outdoor faucet without a shut-off valve, let’s understand why this process is so crucial. During winter, water left in outdoor faucets can freeze and expand, leading to burst pipes and costly repairs. By properly winterizing your outdoor faucet, you can prevent potential damage and ensure your plumbing system remains intact throughout the cold season.
Step-By-Step Guide to Winterize Outdoor Faucet Without Shut Off Valve
Step 1: Locate the Main Water Supply
Since your outdoor faucet lacks a shut-off valve, you’ll need to turn off the main water supply to your home. Typically, the main water shut-off valve is located near your water meter. Turn the valve clockwise to shut off the water supply.
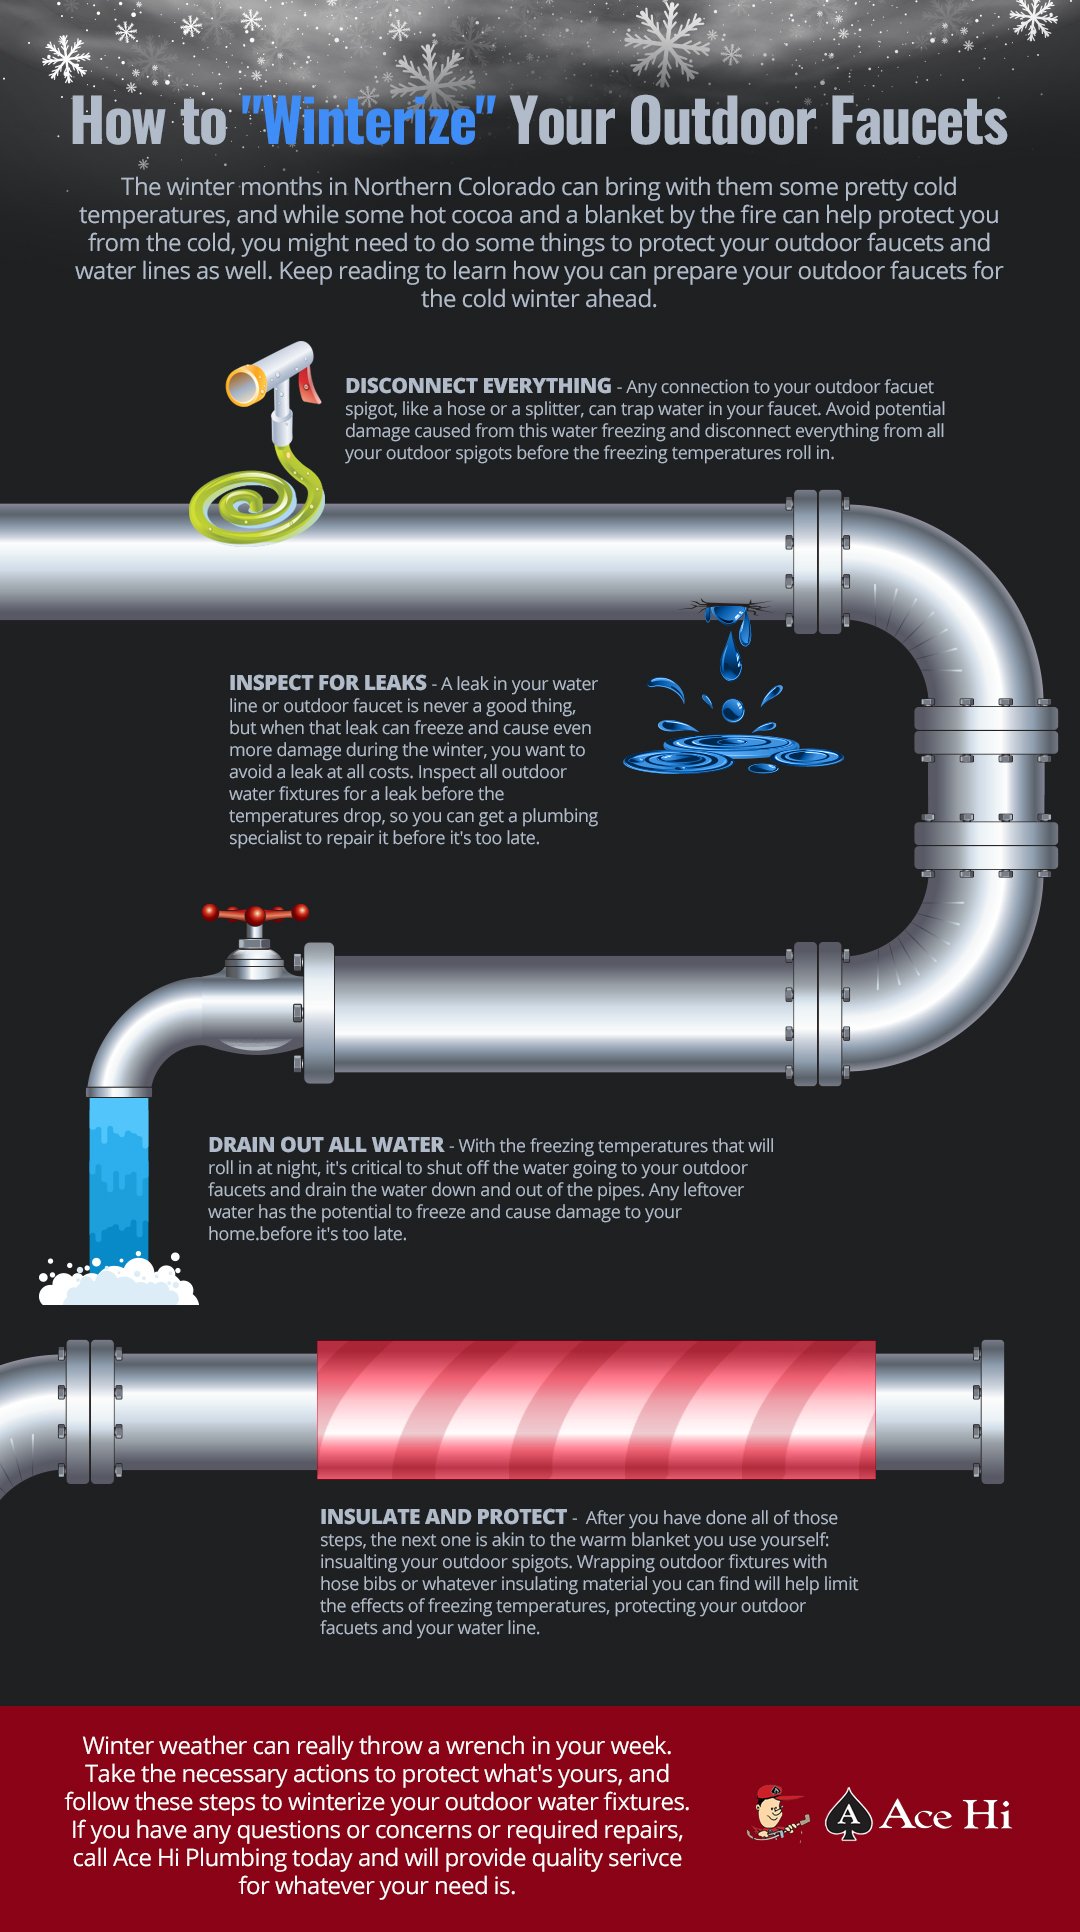
Step 2: Drain the Exterior Faucet
Next, you’ll need to drain any remaining water from the outdoor faucet. Start by opening the faucet to allow water to flow out. You can attach a hose to the faucet to direct the water away from your home’s foundation. Make sure all the water is drained to prevent freezing.
Step 3: Insulate the Outdoor Faucet
Once the water is completely drained, it’s time to insulate the outdoor faucet to protect it from the cold. You can use specialized faucet covers or wrap the faucet with towels and secure them with duct tape. This insulation will help maintain a higher temperature around the faucet, preventing freezing.
Step 4: Apply Heat Tape (Optional)
If you live in an extremely cold climate, you may consider using heat tape to provide additional warmth to the outdoor faucet. Follow the manufacturer’s instructions carefully when installing heat tape to avoid any safety hazards.
Step 5: Monitor Throughout the Winter
After taking all the necessary steps to winterize your outdoor faucet without a shut-off valve, it’s essential to monitor the faucet periodically throughout the winter season. Check for any signs of freezing or leaks, and take immediate action if needed.
Additional Tips for Winterizing Outdoor Faucets
While the steps mentioned above are critical for winterizing your outdoor faucet without a shut-off valve, here are some additional tips to ensure your plumbing system remains protected during the winter:
Tip 1: Disconnect Garden Hoses
Remember to disconnect any garden hoses from the outdoor faucet before winter arrives. Leaving hoses connected can trap water in the faucet, increasing the risk of freezing and damage.
Tip 2: Keep Interior Faucets Dripping
To prevent pipes from freezing inside your home, you can keep interior faucets dripping slightly during extremely cold nights. This constant flow of water can help prevent freezing in the pipes.
Tip 3: Seek Professional Help
If you’re unsure about how to winterize your outdoor faucet without a shut-off valve or encounter any issues during the process, don’t hesitate to seek assistance from a professional plumber. They can provide tailored solutions and ensure your plumbing system is winter-ready.
As we wrap up our guide on how to winterize your outdoor faucet without a shut-off valve, remember that proper winterization is key to protecting your home’s plumbing during the cold season. By following the steps outlined above and staying proactive in your maintenance efforts, you can safeguard your outdoor faucet and prevent costly repairs down the line. Stay warm, stay safe, and happy winterizing!
Thank you for joining us on this journey to winterize your outdoor faucet without a shut-off valve. We hope you found this guide informative and helpful. Until next time, take care!
How to winterize outdoor faucet without shut off valve?
Frequently Asked Questions
How can I prepare my outdoor faucet for winter without a shut-off valve?
To winterize your outdoor faucet without a shut-off valve, you can follow these steps. First, disconnect any hoses or attachments from the faucet. Next, locate the indoor shut-off valve for the water supply line connected to the faucet. Turn off the water supply to the outdoor faucet from this indoor shut-off valve. Then, open the outdoor faucet to allow any remaining water to drain out. You can also consider insulating the faucet with a faucet cover or wrapping it with foam insulation to provide additional protection against freezing temperatures.
Is it necessary to drain the outdoor faucet if there is no shut-off valve?
Yes, it is crucial to drain the outdoor faucet if there is no shut-off valve to prevent freezing and potential damage. Even without a dedicated shut-off valve, you can still prevent freezing by opening the faucet and allowing any water inside to drain completely. This simple step can safeguard your outdoor faucet from bursting or experiencing water damage during the winter months.
Can I use a heat tape to protect my outdoor faucet in the absence of a shut-off valve?
Yes, using heat tape can be an effective method to protect your outdoor faucet if there is no shut-off valve. You can wrap the heat tape around the exposed sections of the outdoor faucet and secure it in place. The heat tape helps prevent the water inside the faucet from freezing by providing a source of warmth. Make sure to follow the manufacturer’s instructions when installing and using heat tape for winterizing your outdoor faucet without a shut-off valve.
Final Thoughts
To winterize an outdoor faucet without a shut off valve, insulate the exposed pipes with foam covers and wrap them with heat tape. Drain the water from the faucet using gravity or a wet/dry vacuum. Disconnect any hoses and store them indoors. Remember to open the faucet to allow any remaining water to drain out. By following these steps, you can protect your outdoor faucet from freezing temperatures without a shut off valve.